
With GTSite, you can easily create a demo site in a few clicks and test everything before going live. A demo site serves as a test website where you can migrate sites, run experiments, use all necessary plugins and themes, and more with a temporary domain before going live. Follow this step-by-step guideline below to learn how to create a demo site in GTData.
How To Create A Site With GTSite #
After you have created a server, you are now ready to create your site. Let’s get started with these step-by-step instructions.
Step 1: Create A Site & Add Information #
Log into your GTSite dashboard, click the ‘+New Site’ to add a new site.

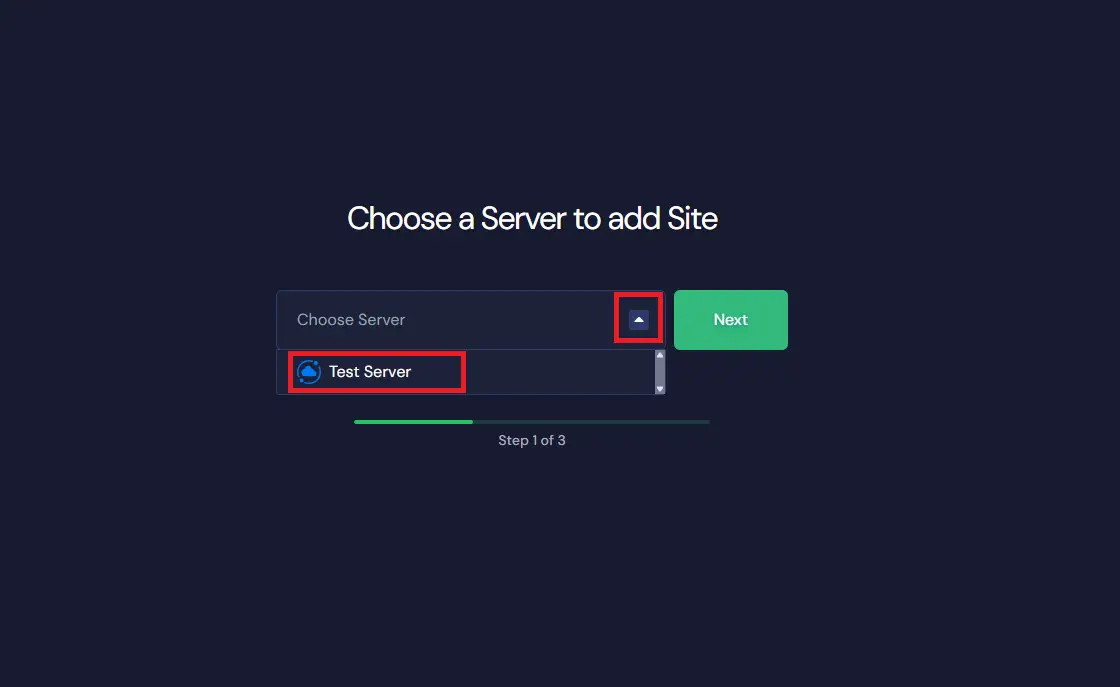
Then, choose a server from the list and click ‘Next’.
We will be creating a fresh WordPress site here. So choose the ‘Install New WordPress Website’ option as shown below.

Step 2: Configure & Install Your Demo Site #
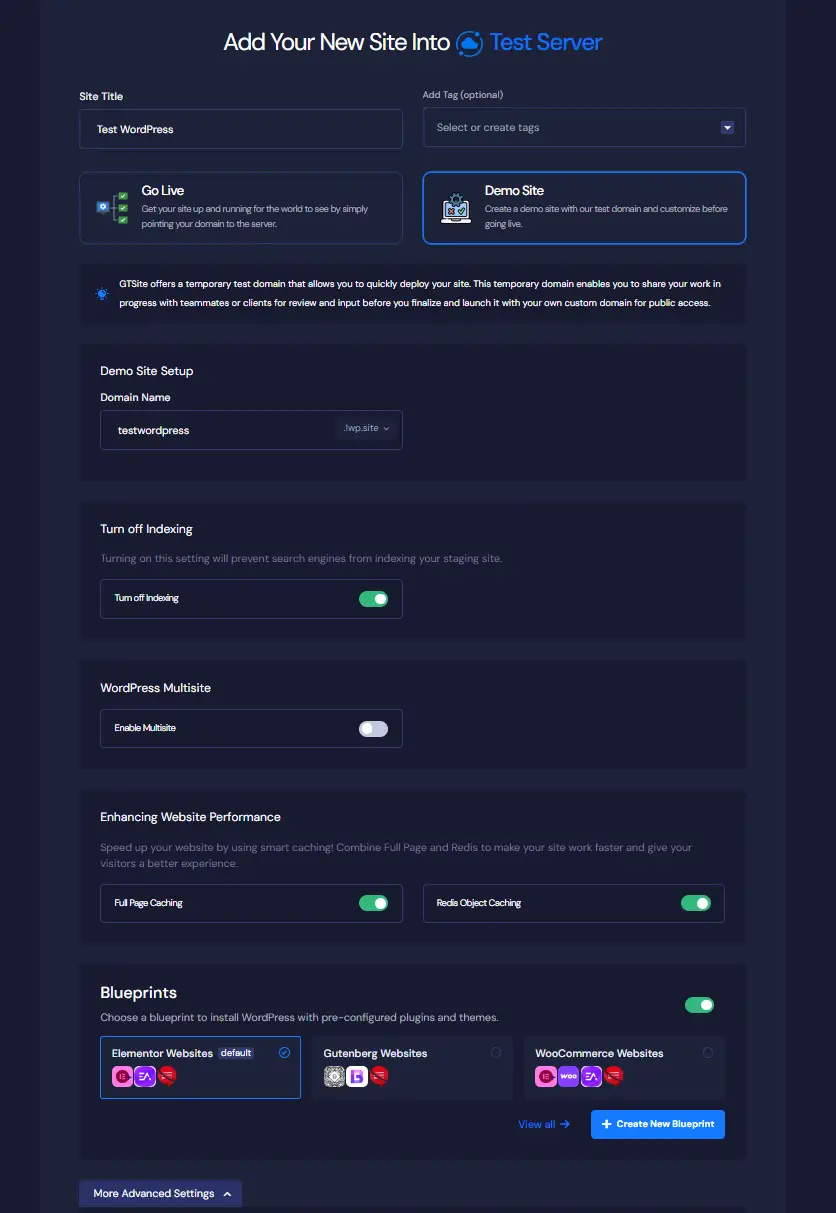
Now, instead of going live, you need to choose ‘Demo Site’ in this section as shown below. Your new WordPress site will be a demo site, so you can run some tests and experiments before sending it live.
Before continuing, please note that GTsite provides demo domains as ‘.wp1.site’ and ‘.wp1.sh’. The demo domains are subdomains of wp1.site and wp1.sh and GTSite uses Cloudflare to manage these domains. You can choose between any of these. Once you go from Demo to Live, you cannot go back to the Demo domain again.
Set a name for your demo site and add relevant tags. Your staging domain will be generated automatically. Now, scroll down to configure more settings, such as Multisite, Caching, Email Provider, and Blueprints as you need.
Configure Additional Settings #
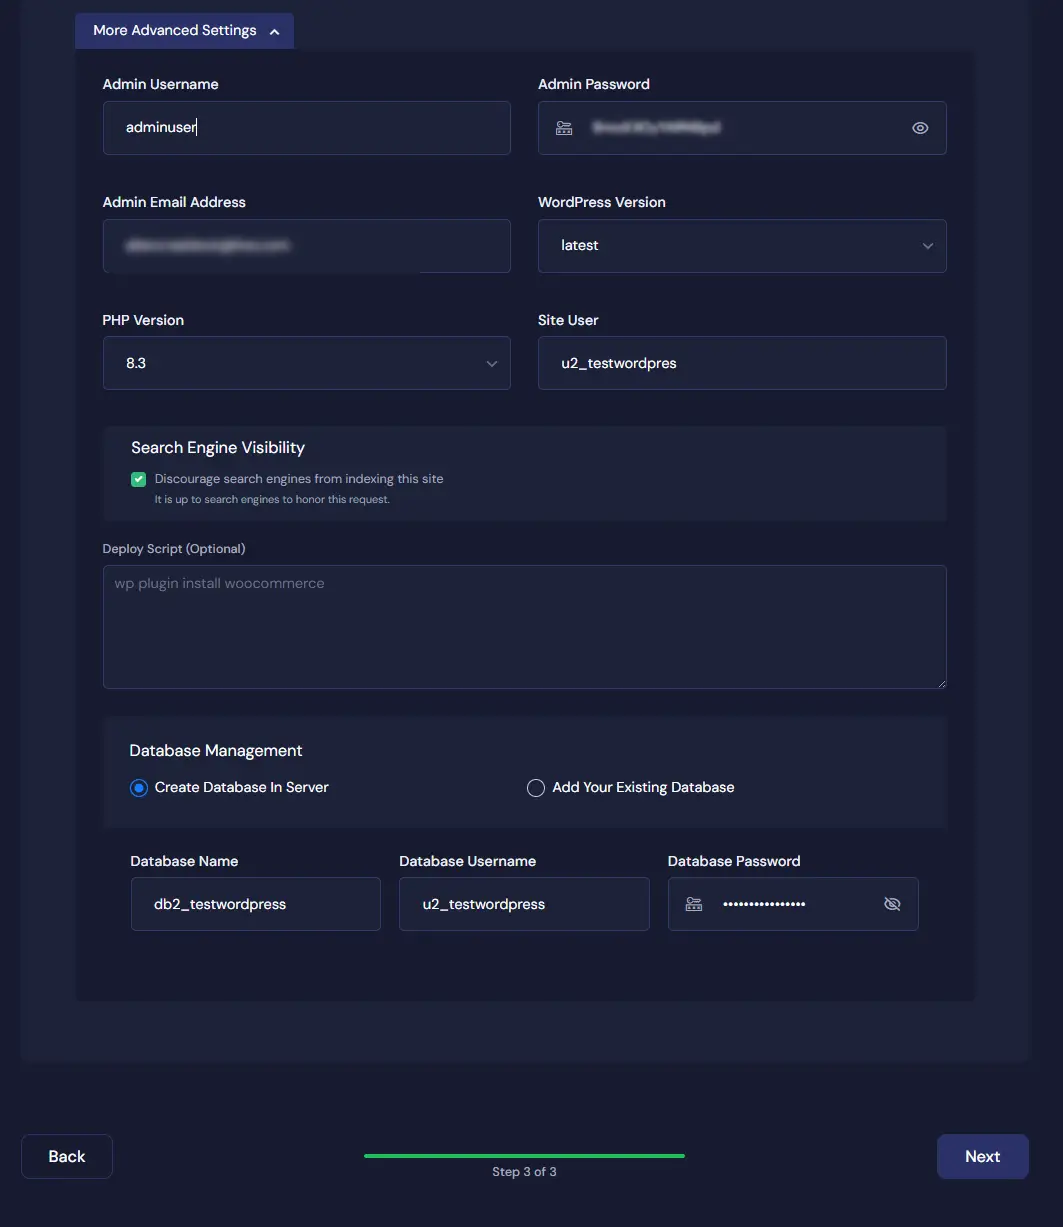
At the bottom, you will see another option for ‘More Advanced Settings’, where you can set and choose admin details, WordPress Version, PHP Version, manage database, and more.
You now have several options to choose from, but the defaults will most likely work for you.
‘Turn off indexing‘ will prevent search engines from indexing your site. This is useful if you are creating a Demo Site, as we will demonstrate going forward.
‘WordPress Multisite’ is a feature you can explore in one of our other tutorials. For most websites, it is best to leaves this turned off.
‘Enhancing Website Performance’ is a feature you can explore in one of our other tutorials. For most websites, it is best to leave these turned on.
‘Blueprints’ is another GTSite feature you can explore in one of our other tutorials. Depending on what you want to do with your website, you can select Elementor or Gutenberg for general sites or WooCommerce for shopping sites. Elementor and Gutenberg are simply two different editors for designing pages and posts in WordPress.
By default, the WordPress admin credentials are auto-generated to speed up the site creation process. As soon as your site is deployed, GTSite will email you your Site Credentials. Later on, you can update your password if needed.
If you would rather set the information now, click the “More Advanced Settings” button, and you can update the default Admin Username, Admin Password, Admin Email Address, etc. along with other additional settings.
Step 3: Review Your WordPress Settings #
After entering all the information, you should review your settings. Here you will get an overall report of your Domain Name, HTTPS Settings, WordPress Version, PHP Version, and much more.
Now, click on the ‘Next’ button to create your WordPress site, which might take 1-2 minutes.
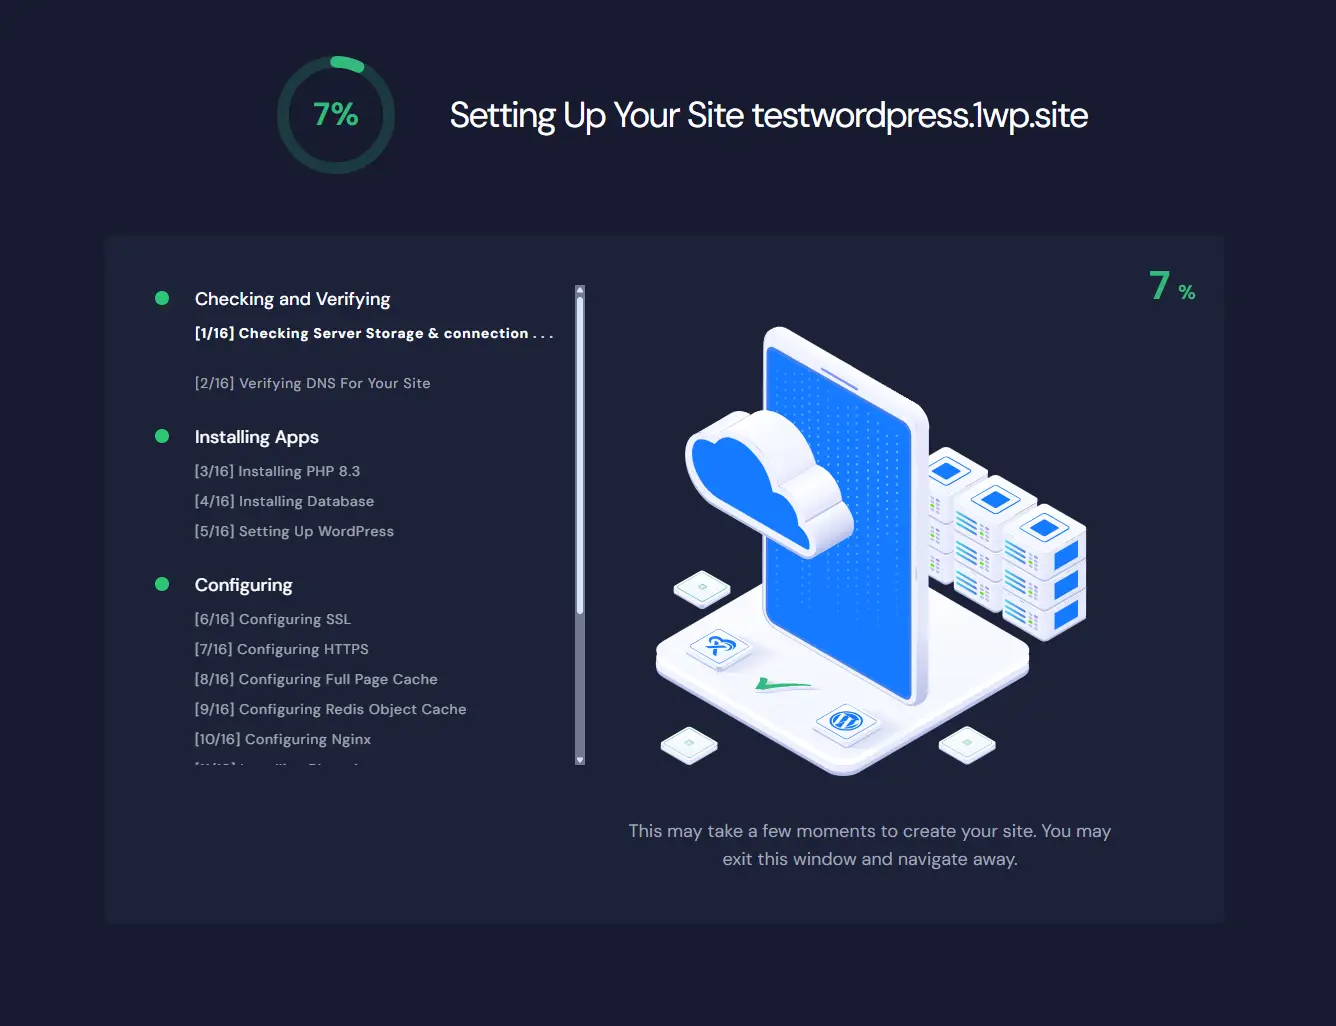
That’s it! You’ve successfully created a demo site on GTSite. Now you can start working on your website, customize it, install themes/plugins (if applicable), and take advantage of GTSite’s optimized server environment for seamless site management.
GTSite provides this demo site to do all the development to your site with a temporary domain. When you are ready with everything on your site, simply select the ‘GO LIVE’ option and add your own domain to make the site available to your users.


